As an Amazon Associate, we earn from qualifying purchases. Some links on this site are affiliate links at no extra cost to you. Our recommendations are based on thorough research and editorial judgment.

Understanding Golden Hour and Blue Hour for Drone Photography
Understanding golden hour and blue hour is essential for capturing stunning drone photography. Golden hour occurs shortly after sunrise and before sunset, featuring warm, soft light that enhances landscapes. In contrast, blue hour, happening after sunset and before sunrise, offers deep blues perfect for dramatic urban shots. We should use tools like the PhotoPills app to plan our sessions and adjust our camera settings for best results. If we examine their key differences, we can greatly improve our aerial photography skills.
Key Takeaways
- Golden hour provides soft, warm light ideal for enhancing landscapes and skin tones, lasting about 30 to 60 minutes after sunrise and before sunset.
- Blue hour features deep blue hues perfect for urban settings, lasting 20 to 30 minutes and ideal for capturing lights against dark skies.
- Golden hour is best for warm, vibrant images, while blue hour suits dramatic contrasts, making both times essential for varied photography styles.
- Arrive 1-2 hours early for drone setup and utilize apps like PhotoPills to plan for precise golden and blue hour timings.
- Use manual settings with low ISO and appropriate shutter speeds for both golden and blue hours to capture the full spectrum of color.
What Is Golden Hour and How Does It Enhance Drone Photography?
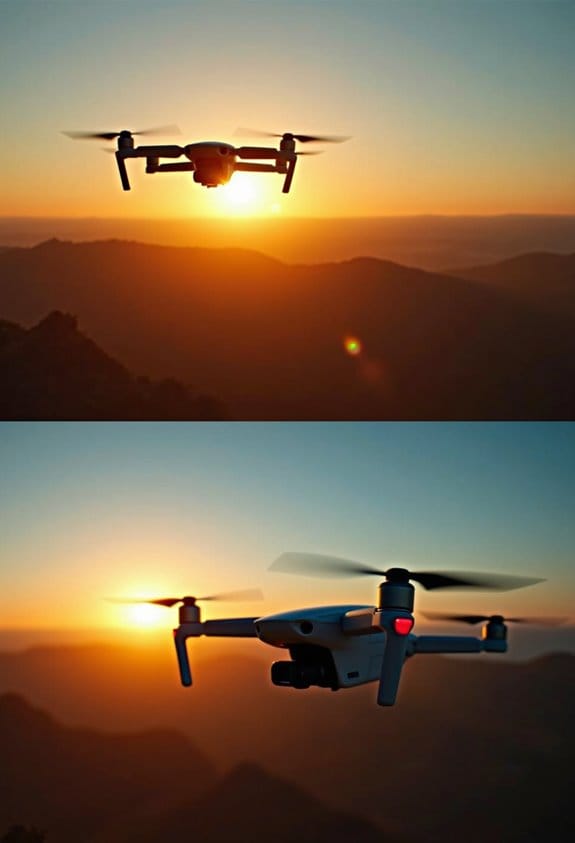
Golden hour is like the secret sauce for photographers, especially for us drone enthusiasts! This magical time happens right after sunrise and just before sunset, giving us that gorgeous, soft light that makes everything look stunning. Think about those moments when the sky is painted in warm oranges and pinks—this is when our aerial images become vibrant and alive. The low angle of sunlight not only brightens colors but also creates long shadows, adding a fascinating depth to our landscapes.
To really make the most of golden hour, you’ll want to look for a bit of cloud cover—aim for 40-60%. This can turn an ordinary sky into a spectacular canvas filled with textures. Don’t forget to switch to manual settings on your drone’s camera. Keep your ISO low and set your shutter speed somewhere between 1/400 and 1/1000 seconds. For instance, if you’re shooting a scenic view, these settings help capture the details in those rich tones without risking that washed-out look when the light dims.
Embracing golden hour can truly transform your photography game, creating images that pop with life and color. So, whether you’re planning a sunrise shoot over the mountains or catching the sunset at the beach, keep an eye on the light. Flying your drone during these times also requires good battery life management to ensure you capture all the perfect shots before the light changes. Next up, let’s explore some tips for planning your drone flights to maximize these magical moments!
Benefits of Golden Hour for Aerial Shots
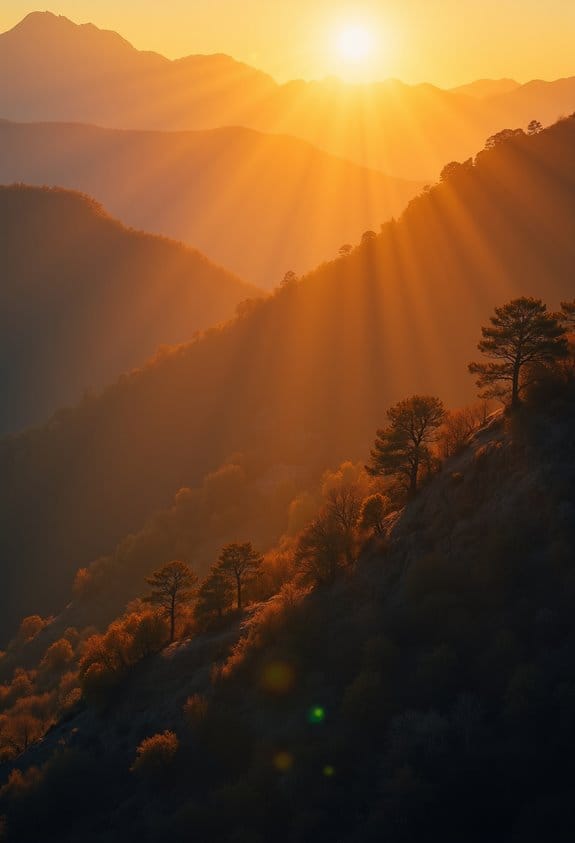
You know that beautiful time just after sunrise or before sunset? That’s called golden hour, and it’s like a secret weapon for aerial shots! Sure, it’s stunning visually with those warm hues, but it really works wonders beyond just pretty colors. During golden hour, the sunlight creates these long shadows that help our aerial photos pop with depth and character, making landscapes look even more extraordinary.
If you’re shooting during this magical window, you’ve got to plan carefully because you’ve only got about 30 minutes before the light shifts dramatically. For example, if you’re capturing a beach at sunset, that golden light can turn the waves into a shimmering palette of gold and orange. Plus, using techniques like HDR bracketing can help balance out those bright skies and shadows, so you don’t lose details in the highlights or the darker areas.
Embracing golden hour really takes your aerial photography up a notch. It’s like having a natural studio light that changes every minute! Looking ahead, let’s talk about some practical tips to make the most of that perfect light and capture stunning images. To further enhance your shots, consider using scratch-resistant and multi-coated filters alongside your drone camera to reduce glare and improve image clarity during these lighting conditions.
Understanding Blue Hour and Its Aesthetic Appeal for Drones
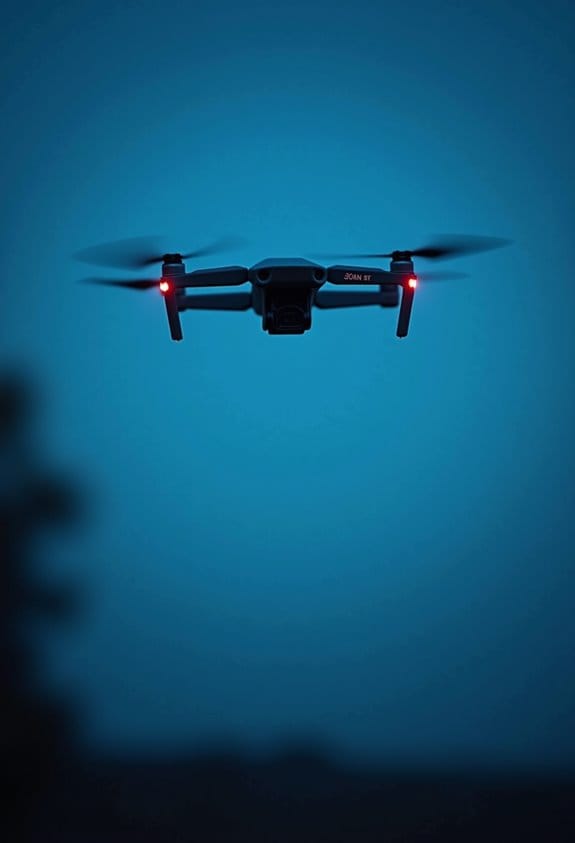
Hey there! Have you ever heard of blue hour? It’s that magical time just after sunset or right before sunrise when the sky transforms into deep blue hues. This awesome period, lasting about 20 to 30 minutes, creates the perfect backdrop for drone photography, especially when urban lights start to twinkle against that rich blue.
To really take advantage of blue hour, it’s smart to plan ahead. Scout out some great locations where you can get a good view. For example, if you’re near a city, find a high vantage point or even a hill where you can capture both the city skyline and the beautiful transition of colors. When you’re up there with your drone, try using slower shutter speeds. This helps to bring out the details in your photos, like light reflections on water or the intricate designs of buildings, all while adding a dreamy quality to your shots.
With a little prep and the right techniques, you can turn those fleeting blue hour moments into breathtaking aerial photographs that really stand out. Speaking of great techniques, let’s chat about adjusting your drone settings for capturing those stunning colors! Additionally, ensuring your equipment has versatile connectivity options can help you quickly transfer and review your shots on multiple devices.
Key Differences Between Golden Hour and Blue Hour
Hey there! So, let’s chat about the fascinating differences between golden hour and blue hour in photography—two magical times of day that can totally elevate your drone shots. Golden hour is that sweet spot right after sunrise or just before sunset, filling the world with warm, soft light. Think about how it makes landscapes glow and gives a beautiful, flattering look to people’s skin tones. For instance, when the sun is low in the sky, it casts long shadows and creates a cozy atmosphere, perfect for capturing those stunning sunset shots.
On the flip side, blue hour comes right before sunrise and right after sunset, and it’s all about those cool, dramatic hues. It’s that time when the sky takes on deep blues and purples, offering a cinematic vibe that can make your photos pop. Picture a city skyline illuminated by streetlights against a rich navy background—that’s blue hour magic! Keep in mind that golden hour sticks around for about 30 to 60 minutes, while blue hour is a bit quicker, lasting around 20 to 30 minutes. This means you have to be ready to adjust your exposure settings on the fly and, always shoot in RAW if you want to catch that full spectrum of colors.
Understanding these differences not only improves your photography skills but also helps you plan better for your next shoot. So, next time you’re out flying your drone, keep an eye on the clock and make the most of these beautiful hours! Using a drone with advanced features like a 3-axis gimbal can help you capture smoother footage during these dynamic lighting conditions.
Recognizing the Best Conditions for Each Hour
Hey there! If you’re looking to capture some stunning drone images, you definitely want to pay attention to the golden hour and blue hour. The golden hour happens daily between 4:21 PM and 4:59 PM, and it’s one of the best times to photograph because of that warm, golden light. With about 40-60% cloud coverage, the colors really pop, making everything look more vibrant. Here’s a tip: try adjusting the white balance manually to really enhance those warm tones when you’re flying your drone.
After you’ve soaked in the beauty of the golden hour, be ready for the blue hour, which only lasts from 5:16 PM to 5:27 PM. This short window gives you those cooler tones that can add depth to your images. After sunset, clear skies are perfect for capturing the contrast between the fading light and city lights. For instance, if you’re hovering over a skyline, you can really highlight how the warm hues of sunset blend with the cooler evening blues. For optimal results during these periods, choosing a drone with advanced stabilization technology can help ensure your footage remains smooth and professional despite changing light conditions.
Planning Drone Sessions Around Golden and Blue Hours
When it comes to planning our drone sessions, timing is everything, especially when we think about those magical golden and blue hours. The golden hour—the time roughly 30 minutes after sunrise and before sunset—gives us that soft, warm light that can make a scene pop. On the flip side, the blue hour, which only lasts about 11 minutes, casts a cool, dreamlike glow that adds a special touch to our shots.
So, here’s what we should keep in mind to make the most of these moments. Arriving at the location 1 to 2 hours in advance is a great way to set up your drone and play around with different angles. It’s all about finding that perfect viewpoint! You can use handy apps like PhotoPills to check precisely when these golden and blue hours are happening in your area—super helpful for planning.
Also, don’t forget to take a quick look at the weather before heading out. A clear sky can enhance colors dramatically, while some clouds can create interesting atmospheric effects. Keep in mind that even though golden hour feels generous, it only lasts for about 38 minutes, so we should stay sharp and plan our shots accordingly.
With a little preparation and attention to detail, we can capture some truly breathtaking images. And just like that, we’re ready to soar into planning the next steps for our drone adventure! Remember, using drones with Electronic Image Stabilization can help ensure smooth, high-quality footage during these brief and beautiful lighting periods.
Essential Tools and Apps for Golden Hour Drone Photography
If you want to capture stunning drone photography during the golden and blue hours, having the right tools and apps can really make a difference. One must-have app is PhotoPills. It helps you keep track of when those perfect lighting moments will happen, so you can be ready with your drone.
Another handy tool is a compass app. Trust me, knowing the right angle for the sun’s position can elevate your shots. For instance, if you’re aiming for that dreamy golden glow in your photos, aligning your drone properly can make all the difference.
Don’t forget about ND filters! These little guys help you control exposure without sacrificing image quality, especially when the sun is shining bright. And if your drone can shoot in RAW format, you’ll capture all the stunning details and colors these magical hours provide.
Finally, take a moment to scout your locations ahead of time using mapping apps. This way, you’ll know how the light will shift and change in certain spots, which can really boost your photography game. So, gear up and prepare for those amazing shooting conditions! Using a high-quality multi-coated ND filter can significantly improve your image clarity and color vibrancy during bright conditions.
Setting Your Camera Right for Golden and Blue Hour Captures
If you want to capture the stunning beauty of golden and blue hours, you’ll need to set your camera up just right! It might seem a bit tricky, but once you get the hang of it, those magical moments can be yours to photograph beautifully. I suggest starting with manual mode; this gives you full control over your exposure settings.
For golden hour, aim to keep your ISO low, between 100 and 200. This helps reduce any noise in your photos. Next, set your shutter speed between 1/400 and 1/1000 seconds to ensure that everything stays nice and sharp. For instance, if you’re photographing a sunset, you’ll want to freeze that golden light as it spills over your subject. On the flip side, during blue hour, you can afford to slow down your shutter speed to around 0.8 seconds. This way, you let in more light without making your shots blurry—perfect for those soft blues in the sky.
It’s also a good idea to manually adjust your white balance. During golden hour, go for about 4500-5500K to bring out those warm tones. When the blue hour rolls around, dialing it down to cooler hues will give your images that dreamy, twilight feel. Lastly, don’t forget to shoot in RAW format! It gives you much more flexibility when you edit your photos later.
Using an action camera drone with stabilization features can further enhance your aerial golden and blue hour shots by minimizing shaky footage and producing clearer images.
With these tips in hand, you’ll be well on your way to mastering your camera settings for golden and blue hour captures. Now, let’s talk about composition for those stunning shots!
Using Composition Techniques in Aerial Photography
Hey there! Now that we’ve nailed down our camera settings for those stunning golden and blue hour shots, let’s chat about how we can really boost our aerial photography with some cool composition techniques. During the golden hour, that low sun does wonders, creating beautiful highlights and shadows that really add depth. For instance, if you’re over a winding river, let it lead your viewer’s eye through the scene, making the shot feel more dynamic.
When you’re up in the air, experimenting with different altitudes can be super helpful. For example, if you zoom in close to a forest, you can highlight the intricate patterns of the treetops. But if you pull back, you’ll capture the vastness of the landscape, which can be equally stunning. And don’t forget about water—capturing reflections in lakes can create some amazing symmetry in your photos.
Also, keep the rule of thirds in mind. It’s a simple trick that can really help your images feel balanced and engaging. Think about placing that horizon line a third of the way up or down in your frame, for a more interesting composition. As you practice these techniques, you’ll find your own unique style, which makes every flight even more exciting! Next up, let’s explore how to manipulate light for even more dramatic effects in our aerial shots. Utilizing drones like the DJI Mini 4 Pro with advanced camera features can significantly enhance your ability to capture these compositions perfectly.
Addressing Shutter Speed and Battery Limitations in Low Light Photography
Hey there! So, when we’re out photographing in low light conditions, especially during those gorgeous golden and blue hours, getting the right shutter speed is key to capturing great photos. For instance, during golden hour, a shutter speed of around 1/400 of a second could be perfect, while when the sun has dipped a little deeper into the horizon during blue hour, you might find yourself using something like a shutter speed of 0.8 seconds.
But here’s the catch: if you’re using those slower shutter speeds, there’s a good chance of getting motion blur, which can make your shots look fuzzy. That’s why having a steady tripod or stabilizing gear is super important. Also, keep in mind that if you’re flying a drone during these times, the battery can drain faster, especially in cooler temps. It’s a smart move to have spare batteries kept warm so you can keep snapping those beautiful moments without running out of power.
And remember to keep an eye on your battery levels, too! Changing light conditions can impact how much time you have left for shooting, so a little bit of planning can go a long way. It all adds up to a fun and successful photography outing! Speaking of which, let’s chat about the best techniques to keep our shots clear and focused in tricky lighting.
Choosing a drone with altitude hold function can significantly improve stability when shooting in low light conditions.
Frequently Asked Questions
Can I Drone During Golden Hour and Blue Hour Simultaneously?
Yes, we can fly our drone during both golden hour and blue hour, but we’ll need to contemplate drone regulations, face lighting challenges, employ effective photographic techniques, and choose our subjects carefully for stunning results.
How Do Weather Conditions Affect Golden and Blue Hours?
Weather conditions considerably affect golden and blue hours. Cloud cover can soften light, while atmospheric conditions, humidity impact, and precipitation influence the vibrancy of colors, creating unique photography opportunities that we shouldn’t overlook.
What Camera Settings Are Best for Low-Light Conditions?
In low-light conditions, we should use a higher ISO setting, wide aperture for more light, slower shutter speed for exposure, and adjust exposure compensation as needed to balance highlights and shadows in our shots.
Is There a Specific Season That Enhances Golden and Blue Hours?
Absolutely, seasonal variations amplify the beauty of golden and blue hours. With geographic influences, landscapes transform, enhancing color saturation and creating stunning contrasts. Let’s explore these moments together, capturing nature’s artistry throughout the year!
How Can I Find Exact Times for Golden and Blue Hours?
We can find exact times for golden and blue hours by using golden hour tools and blue hour apps. Photography calculators and sunset timing websites also help us plan our shoots perfectly for stunning visuals.