As an Amazon Associate, we earn from qualifying purchases. Some links on this site are affiliate links at no extra cost to you. Our recommendations are based on thorough research and editorial judgment.

Common Beginner Mistakes in Drone Photography and How to Avoid Them
Common beginner mistakes in drone photography often stem from inadequate planning and understanding of key principles. We sometimes forget to check the weather, which can lead to poor lighting and unstable conditions. It’s also easy to fly too high, resulting in diminished image quality. Other pitfalls include neglecting camera settings and safety regulations. By utilizing GPS, optimizing composition, and performing essential pre-flight checks, we can greatly improve our outcomes. Let’s explore more ways to enhance our aerial photography skills.
Key Takeaways
- Failing to plan flight paths and shooting locations can lead to missed opportunities; use maps for pre-flight preparation.
- Ignoring weather conditions could result in poor footage; always check forecasts and avoid shooting in strong winds or rain.
- Not maintaining proper camera settings, such as ISO and shutter speed, can lead to low-quality images; familiarize yourself with basics before shooting.
- Overlooking drone safety regulations and flying in restricted areas may lead to legal issues; always verify airspace regulations before takeoff.
- Neglecting to perform pre-flight checks, like battery status and equipment inspection, increases the risk of malfunctions during flight.
The Importance of Planning Your Shot Before Takeoff

When you’re ready to capture those stunning aerial shots with your drone, planning your shot before takeoff is a must! It really helps you nail down what you’re focusing on and makes a big difference in how your angles and lighting come out. Picture this: you’re using Google Maps to scope out a location. You can pinpoint spots that have a great view while avoiding those pesky trees or power lines that could ruin your shot.
Taking just a few minutes to plan on the ground can save you a ton of time once you’re up in the air. For instance, sketching out a flight path can ensure you don’t miss that perfect shot of a sunset reflecting off a lake. Plus, timing your shoot during the golden hour—just after sunrise or before sunset—can give your photos an extra layer of warmth and depth. Utilizing drones with advanced GPS and safety functions can further enhance your shooting experience by providing stable hovering and auto-return features, which are essential when executing pre-planned flight paths.
Recommended Products
【Compatible with DJI Flip / Lito X1】 This drone gear accessories set is compatible with DJI Flip and Lito X1 Drone. It includes five neutral density lens filters (ND8,...
Navigating Weather for the Perfect Shot

How can we make sure our drone photography isn’t thrown off by unpredictable weather? Well, one of the best tips is to plan your shoots around the golden hour—right after sunrise or just before sunset. The light during these times is warm and soft, making everything look magical. For instance, if you head out at dawn, you might catch the sun rising over a misty landscape, creating stunning visuals.
It’s also smart to check the weather forecast before your shoot. Avoid days with strong winds or rain since both can ruin your stability and clarity. Tools like SunCalc can help you figure out the sun’s position, so you know exactly when the light will be just right. If the day looks overcast and dull, it might be worth postponing your shoot; cloudy skies can often lead to flat, uninspiring images.
Lastly, don’t forget to check your drone’s wind tolerance before taking off! If it’s too windy, it can shake your drone and make your footage look blurry or worse, cause it to crash. For example, if your drone can only handle winds up to 15 mph, and the forecast calls for 20 mph gusts, it’s better to wait for a calmer day. Keeping these tips in mind can help you capture breathtaking shots while avoiding the pitfalls of unpredictable weather. Additionally, using a waterproof and shockproof memory card ensures your footage remains safe even in challenging outdoor conditions.
Recommended Products

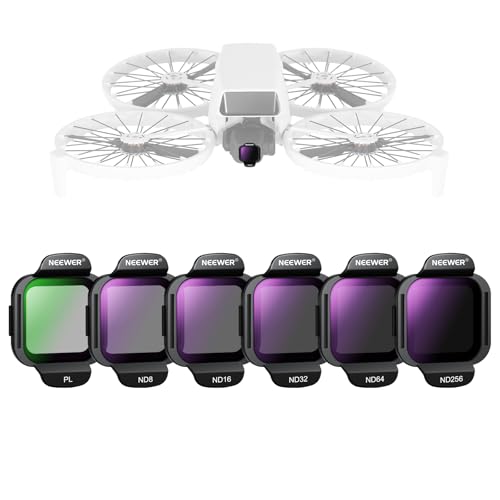
【6 Pack Snap On Drone Lens Accessories】 The kit for your drone gear includes 4 x Neutral Density filter (ND4/ND8/ND16/ND32), 1 x circular polarizing filter, and 1 x UV filter, compatible with DJI Mini 4K Drone with 4K UHD Camera for Adults/ Mini 2 / Mavic Mini / Mini SE / Mini 2SE and Fly More Combos, meeting various photography needs, from glare reduction to long exposure effects, as well as providing lens protection. Simple snap on design makes easy and swift filter attachment and dismounting

【Lightweight Plastic Frame】 Built with a plastic frame, each filter is easy to install and remove from the camera lens. At just 0.024oz/0.7g, it will not affect drone gimbal calibration and balance

【4-Pack Avata 2 ND Filter】This latest 4-Pack ND Filter Kit From K&F CONCEPT is specially designed for DJI Avata 2, which includes ND8, ND16, ND32, and ND64. Features ultra-lightweight, it ensures your drone gimbal safe, and made of top optical glass to help reproduce uncompromised pictures, it's a valuable addition to your droneshot toolkit.
Why Flying Too High Dims Your Image Quality

Hey there! You know how flying too high with a drone can really mess up your image quality? It’s frustrating, right? When you’re up above 120 meters, you start losing clarity and detail in your photos, which can make them look pretty bland. Drones, unlike bigger cameras, usually come with smaller sensors and shorter lenses, so the sweet spot for capturing crisp images is around 60 meters.
By keeping it lower, you can create more interesting compositions. Let’s say you’re trying to photograph a forest or a bustling market; those lower shots can really highlight unique patterns and textures you might miss from way up high. It’s like having a front-row seat to the action, where every detail stands out. Additionally, using drones equipped with GPS navigation features can help maintain stable positions for capturing sharp images at ideal altitudes.
How to Compose Stunning Drone Shots
If you want to create stunning drone shots, let me share a few tips that can make a real difference! First off, get familiar with the concept of composition. It’s all about how we arrange things in our frame to catch the viewer’s eye. One simple technique you can use is the “rule of thirds.” Imagine dividing your image into a 3×3 grid. By placing important elements along these lines or at their intersecting points, you can create more dynamic shots that really draw people in.
Next, think about the height and angle from which you shoot. Don’t just stick to eye level; try experimenting with higher or lower angles, or even capturing top-down shots. For instance, if you’re flying over a river, angling down and catching the ripples can offer a fresh perspective. Also, keep an eye out for leading lines—like a winding road or a path through the woods—that can naturally guide the viewer’s gaze into your photograph.
And let’s not forget about layering! Pay attention to the foreground, middle ground, and background in your shots. This adds depth to your images and makes them feel more three-dimensional. Oh, and make sure your horizon line is straight; it’s a small detail, but it gives a more polished look to your work. With these tricks in your back pocket, you’ll be on your way to capturing breathtaking aerial images that stand out!
Now, once you’ve got your composition down, it’s time to think about lighting and timing, which can take your drone photography to the next level. Using drones with 3-axis brushless gimbals can also significantly improve the stability of your shots, reducing blurriness caused by vibrations during flight.
The Impact of Sun Position on Your Shots
You know, the sun’s position really can make or break our drone shots. If you’ve ever tried shooting during the harsh midday sun, you probably noticed how it creates glare and flattens out your images. That’s why it’s smart to aim for the golden hour—just after sunrise or before sunset. During these times, you’ll get that lovely, soft light that really brings your photos to life.
When you’re framing your shots, it’s generally a good idea to avoid having the sun directly in the picture. Instead, try angling your shots to make use of the sunlight without showing the sun itself. For instance, if you’re capturing a landscape, position your drone so the sunlight highlights your subject from the side, giving it depth and dimension.
Using ND filters can also be a great tactic. They help reduce the amount of light hitting your camera sensor, which means you can control your shutter speed better and avoid that washed-out look. And if you want to plan your shoots around the sun’s position, there are apps like SunCalc. They can really help you visualize the sun’s trajectory throughout the day, making your drone photography experience even better. Speaking of planning, understanding other environmental factors can also elevate your shots—let’s explore that further!
One way to achieve balanced exposure and cinematic results is by using ND filters with multi-layer coatings, which reduce glare and enhance image quality.
Key Camera Settings for Drone Photography
Hey there! If you’re getting into drone photography, understanding some key camera settings will really help you take your shots to the next level. First things first, always set your drone camera to shoot in RAW format. This way, you’ll capture a lot more detail compared to JPEG, which is super helpful when you’re editing your photos later.
Now, let’s talk about ISO. It’s best to keep it at the lowest setting possible. This helps keep your images nice and clean, especially if you’re shooting in low-light situations. For example, if you’re taking shots at dawn or dusk, a low ISO will minimize that annoying visual noise that can pop up.
When it comes to shutter speed, aim for a speed that’s at least double your frame rate. So if you’re recording at 30 frames per second, setting your shutter speed to 1/60 will give you smooth, natural-looking video. Also, don’t forget about manual white balance; this is key for keeping your colors looking true to life.
Lastly, try out different picture profiles, like D-Cinelike or Log. These options give your footage a flatter color grade, which is great for color grading during editing. With these tips in mind, you’ll be on your way to capturing stunning aerial shots. Next, let’s explore how to plan your drone flights for the best compositions!
Keep in mind that choosing drones with advanced stabilization technology can significantly enhance the smoothness and quality of your footage.
Recommended Products

【3 Pack Drone Filter Set】 Compatible with DJI Mini 4K, Mini 2 SE, Mini SE, Mini 2, Mavic Mini and Fly More Combos, this circular polarizing neutral density drone filter set elevates your aerial photography and videography to a professional level. Each lens filter quickly snaps onto the camera and locks into place with a hook for secure attachment during flights

【Lightweight Design】 The filter frame is made of aviation aluminum alloy, and the edge of the frame adopts CNC non-slip design, which is easy to install and disassemble. It weighs only 1.2g without affecting drone calibration and balance.

This FPV ND UV Filter Set is compatible with O4 Pro Air Unit, ensuring its adaptability and suitable for aerial video shooting.
Drone Safety and Regulations
Hey there! Let’s chat about drone safety and regulations because they’re super important for keeping everyone—both in the air and on the ground—safe. If you’re new to flying drones or just curious about the rules, it’s essential to know what you’re getting into. For instance, if your drone weighs over 0.55 pounds, don’t forget to register it with the FAA. It’s a simple process that helps keep the skies organized.
You also want to be aware of restricted airspaces like airports or military zones. Flying in these areas usually means you need special permission, so it’s best to check before taking off. Plus, keeping your drone below 400 feet is crucial because it helps avoid any close calls with manned aircraft. Think of it like driving; you wouldn’t want to speed on a busy road!
Another thing to keep in mind is privacy. If you’re flying your drone over a neighborhood and want to take some cool shots, make sure to respect people’s privacy. It’s a good idea to ask for consent if you’ll be capturing images of their property, just to be respectful.
Also, many drones come equipped with obstacle avoidance systems that help prevent collisions and enhance safe flying.
Recommended Products

FAA Regulation Compliance: Holy Stone is committed to working out a solution to the US FAA Declaration of Compliance for our rc drone consumers; here we got the Remote ID Module Parts to solve the FAA Compliance issue. No more worry about the FAA Regulations.

【𝗜𝗡 𝗦𝗘𝗔𝗥𝗖𝗛 𝗢𝗙 𝗧𝗛𝗘 𝗜𝗗𝗘𝗔𝗟 𝗙𝗟𝗜𝗚𝗛𝗧, 𝗖𝗔𝗣𝗧𝗨𝗥𝗘 𝗬𝗢𝗨𝗥 𝗔𝗘𝗥𝗜𝗔𝗟 𝗠𝗢𝗠𝗘𝗡𝗧𝗦】Are you spending more for better aerial footage or settling for a budget drone with poor image quality? The Gleesfun G11PRO is the perfect choice. This affordable drone features a sleek design, FAA compliance, and carrying case. With a 3-axis brushless gimbal, 10000ft GQ2.0 digital transmission, and up to 70mins flight time, it delivers smooth, stable, professional-grade shots. Capture 6K photos and 4K/30fps video with stunning clarity, and enjoy effortless aerial photography with cruise modes.

【FAA Compliance】Easily meets FAA requirements for drones over 250 g (0.55 lb). The HT65 RID module replaces bulky add‑on RID units, enabling legal flight for Mavic 3, Mini 4 Pro, Phantom 4, ATOM 3‑Axis, HS720 series, FPV drones, and 20+ other models.
Essential Pre-Flight Checks for Your Drone
Hey there! So, before we launch our drones into the sky, it’s super important to run through some essential pre-flight checks. Think of it like a quick health check for our flying gadgets to make sure they’re ready for action.
First up, let’s talk about battery levels. Make sure your battery is fully charged because nothing’s worse than soaring high only to have your drone suddenly drop from the sky due to power loss. A good tip is to always charge your battery the night before a flight—just to be safe.
Next, give your drone a good physical inspection. Look for any cracks or loose parts that could affect how it performs in the air. For example, if you notice a loose propeller, tighten it up before you fly; it could save your drone from a nasty crash.
Don’t forget about the memory card! Clearing it of old footage is a smart move to ensure you have enough space for all those new breathtaking shots you’ll capture. While you’re at it, perform a quick compass calibration too—it’s essential for keeping your drone stable and accurately positioned during flight.
Oh, and another thing: check for firmware updates. Keeping your drone’s software current can help improve performance and fix any bugs. Just like your phone, this keeps everything running smoothly and helps you avoid any surprises mid-flight.
Additionally, verifying your drone’s obstacle avoidance system is functioning properly can prevent potential accidents during your flight.
With these pre-flight checks done, you’ll be ready to enjoy a safe and successful flying experience. Now, let’s move on to some tips for planning the perfect route for your next drone adventure!
Recommended Products

Complete Accessory Kit: Battery and propellers kit with charging cable designed specifically for Bingchat AE Series Professional Drone

Compatible with Autel EVO 2/ EVO 2 Pro (V2 & V3)/ EVO 2 Pro RTK/ EVO 2 Dual (640T)/ EVO 2 Dual 640T RTK Drones. Note: The Propeller is not fit for EVO II Pro Enterprise drone.

Name: Brushless Motor; Model : A2212-13; KV : 1000RPM/V
Avoid Over-Editing in Drone Photography
Hey there! So, when it comes to drone photography, we definitely want to steer clear of over-editing our images. It’s super tempting to jump right into all those editing tools, but the goal is to capture the true beauty of the scene without turning it into something unrealistic. Think about it: if you crank up the saturation too much, those vibrant colors can end up looking artificial, and that’s not what we’re aiming for, right?
Instead, try using software like Lightroom for color correction. It helps you enhance your images in a more natural way without making it look like you’ve gone overboard. And if you’re shooting in RAW format rather than JPEG, you’ll preserve more detail in your images, which gives you more wiggle room when you’re editing. For instance, you can tweak the exposure a bit or adjust shadows and highlights without losing quality.
It’s also a good habit to regularly step back and evaluate your edits. Ask yourself whether your changes enhance the photo or detract from it. Keeping a sharp, critical eye on your work helps you maintain that professional standard. This way, you’ll avoid relying on effects that might actually hurt the overall quality of your images.
Additionally, using lightweight, stable equipment such as carbon fiber propellers can improve your drone’s flight stability, leading to clearer and more precise shots.
In the next part, let’s explore some practical tips on how to capture those breathtaking drone shots in the first place!
Learning From Past Mistakes to Improve Future Flights
You know, when it comes to improving our drone photography, reflecting on past flights is super helpful. Think about it: by looking back at our flight logs, we can pinpoint which shots turned out great and which ones, well, didn’t quite hit the mark. For example, if you notice that your sunset photos just don’t pop, maybe your camera settings weren’t ideal for those lighting conditions.
Keeping a simple journal can really work wonders. Jot down what the weather was like, the settings you used on the camera, and how each shot turned out. This way, when you encounter similar conditions in the future, you’ll have a go-to reference to make better decisions. Plus, it’s always a good idea to ask seasoned pilots for feedback. They often have a wealth of knowledge about common pitfalls.
Another great tip is to regularly review your footage. Look for patterns—like which compositions or angles shine in your shots. Engaging in online forums can also open up a treasure chest of insights from various drone enthusiasts. You’d be surprised how many people share their experiences and the lessons they’ve learned. By focusing on these reflections, we not only avoid past mistakes but also pave the way for even better flights ahead! Additionally, understanding the benefits of GPS functionality in drones can greatly enhance flight stability and image quality.
Frequently Asked Questions
What Is the Most Common Mistake Made by Beginning Photographers?
The most common mistake we make as beginning photographers is neglecting proper exposure settings. We often rely on auto modes, which can leave our images dull or improperly lit, hindering our creative potential.
What Is the 1 to 1 Rule Drone?
The 1 to 1 Rule in drone photography lets us enhance our aerial composition—keeping our altitude and distance equal. This approach greatly increases clarity, making our subjects more prominent and the overall images more alluring.
What Are Common Drone Landing Mistakes?
When landing, we often overlook obstacles and neglect our battery levels. We should focus on slow descents, signal intentions clearly, and complete pre-landing checks to guarantee safe and successful landing techniques every time.
What Are the Do’s and Don’ts of Drones?
When flying drones, we must prioritize safety. Let’s know the regulations, check our equipment, plan our flights carefully, monitor weather conditions, and practice manual settings. Following these do’s and don’ts keeps our experiences enjoyable and safe.