As an Amazon Associate, we earn from qualifying purchases. Some links on this site are affiliate links at no extra cost to you. Our recommendations are based on thorough research and editorial judgment.

Understanding the Rule of Thirds in Aerial Photography
Understanding the Rule of Thirds in aerial photography can notably enhance our compositions. By dividing our frame into nine equal sections with grid lines, we can place the horizon along the upper or lower lines, and position key subjects at intersections to create balance and interest. With practice, we can use this technique to guide viewers’ eyes and emphasize various elements in our shots. Stick around, and we will explore practical tips for applying this rule effectively in our aerial photos.
Key Takeaways
- The Rule of Thirds divides images into nine equal parts, enhancing visual interest by placing key subjects along grid lines.
- Aligning the horizon with the upper or lower grid line can dramatically improve the composition’s appeal.
- Leading lines, like rivers or roads, guide the viewer’s eye and can be strategically placed at grid intersections for engagement.
- Balancing sky and ground elements through proper horizon placement highlights different features of a scene effectively.
- While the Rule of Thirds is useful, breaking it can create impactful contrasts and allow for creative expression in aerial photography.
Understanding the Rule of Thirds for Aerial Photography
When you start getting into aerial photography, one of the first things you should grasp is the Rule of Thirds. This composition technique divides your image into nine equal parts using grid lines, and it helps you set up your shots to be way more visually interesting. Imagine you’re capturing a stunning sunset; instead of centering the horizon, try positioning it along the upper or lower grid line instead. This instantly makes your shot more dynamic and engaging.
Another tip is to look for leading lines in your shots—like a winding river or a path that draws the viewer’s eye toward your subject. It’s not just about where you place things, but how elements in your frame can direct attention. And speaking of placement, aligning your main subject with the intersecting lines of the grid can significantly improve the balance of your photo.
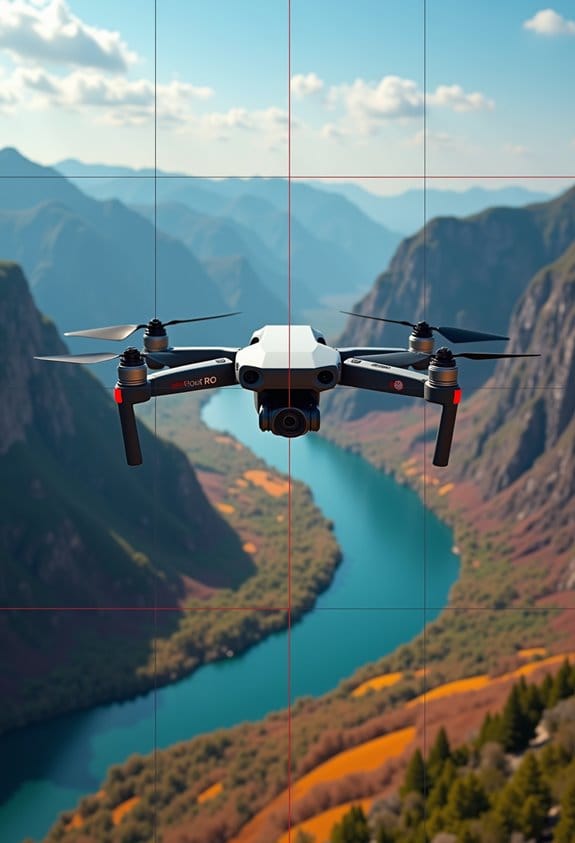
Also, pay attention to negative space. That’s the area around your subject that isn’t filled with detail. Using extra space creatively can make your image pop and really emphasize what you want to highlight. So, as you’re planning your next aerial shot, think about how the Rule of Thirds can help you craft images that are not just good, but truly captivating! For the best results, using a drone equipped with a high-resolution camera can capture the intricate details that make these compositions stand out.
How to Apply the Rule of Thirds in Your Aerial Shots
Hey there! So, let’s chat about how to apply the Rule of Thirds in your aerial shots. It’s a fantastic way to make your images pop. First things first, have you ever thought about using grid lines on your drone’s camera? They’re super helpful for visualizing where to place elements in your frame according to the Rule of Thirds.
Imagine this: you’re flying your drone over a stunning landscape. If you line up the horizon along one of the grid lines, it instantly brings balance to your shot. Or, if there’s a striking mountain peak, try positioning it at one of the intersections on the grid. This draws the viewer’s eye right to it, making your photo much more engaging.
And here’s a little tip—while you’re out there capturing these aerial shots, don’t hesitate to take multiple shots from different angles. This way, when you get to editing, you’ll have some great options to play with! Plus, planning ahead by identifying what you want to shoot and where you’ll place it on the grid can really boost the impact of your photos.
Once you start incorporating these ideas, you’ll be amazed at how much more dynamic your aerial photography can become! And to ensure your stunning shots are saved flawlessly, consider using U3 memory cards for reliable and fast storage. Next up, let’s explore how lighting can further elevate your shots.
Tips for Positioning Elements for Strong Aerial Compositions

Hey there! If you’re looking to create aerial compositions that really grab attention, let’s talk about some cool techniques. First off, activating the grid lines feature on your drone’s camera app can make a world of difference. It helps you visualize the Rule of Thirds, which is all about positioning your important elements to make your photos more engaging.
Think about it this way: when you’re out there capturing shots, aim to place interesting subjects—like a colorful building or a stunning rock formation—at the intersection points of the grid. This little trick makes your photos naturally more dynamic. Also, when you’re framing those horizon lines, try to align them with the horizontal grid lines. It’ll help avoid that awkward bottom-heavy look that can sometimes pop up.
Another tip is to overshoot your scenes; take multiple angles of the same subject. This way, you’ll have more options to choose from when you’re editing, and you increase your chances of landing on a fantastic shot. Plus, by planning your aerial sessions with the Rule of Thirds in mind, you’ll not only save on battery life but also improve your composition game. Using drones with intelligent flight modes can further enhance your ability to capture creative and well-composed aerial shots.
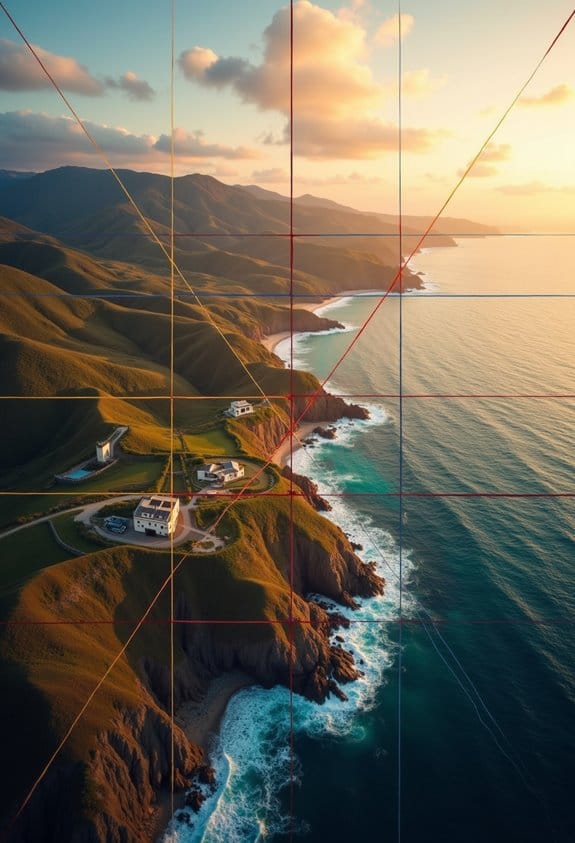
How to Balance Sky and Ground in Your Aerial Photos
When it comes to aerial photos, balancing the sky and ground is super important for making your shots pop! Think of it this way: where you place the horizon line can really change the mood of your photo. Try using the rule of thirds by lining up the horizon on one of the grid lines—this can highlight either a beautiful sky or interesting ground features depending on what you want to share with your viewers.
For instance, if you’re shooting over a stunning valley, position the horizon lower to showcase the vastness of the sky. On the other hand, if you’re flying over a picturesque beach, placing the horizon higher draws attention to the sandy shore and waves. Adding elements like trees, mountains, or even a winding river at those intersection points of the grid can make your composition even more engaging.
Also, don’t be afraid to change your altitude while flying your drone! Lower perspectives can create a closer connection between the sky and ground and offer a fresh take on familiar scenes. Remember, a good rule of thumb is to fill one-third of your frame with sky and two-thirds with ground; this keeps the scene lively and directs your viewer’s focus right where you want it. Drones with advanced stabilization technologies can help ensure your aerial shots remain crisp and smooth even at varying altitudes. Now that you have a handle on balancing sky and ground, let’s talk about how to choose the best times of day for your aerial photography!
Using Post-Processing to Elevate Your Rule of Thirds Compositions
Hey there! So, once you’ve got a nice balance between the sky and the ground in your aerial photos, it’s time to think about how post-processing can really make your compositions pop using the Rule of Thirds. Have you ever used Adobe Lightroom? It’s super helpful for this! You can utilize those crop tools with grid overlays to help you realign your images.
For instance, if you adjust the horizon line to sit on either the upper or lower third of your photo, it can create a more dynamic look. When you place important elements—like a mountain peak or a cluster of trees—along those gridlines, it draws the viewer’s eye and makes the photo more engaging. Just keep in mind that while cropping is a great way to improve balance, you don’t want to crop too much, as that can hurt the resolution of your image. Additionally, applying CPL filters during shooting can enhance colors and reduce glare, which helps your post-processed Rule of Thirds compositions stand out even more.
When to Break the Rule of Thirds in Aerial Photography?
You know, while the Rule of Thirds is a classic guideline in photography, especially in aerial shots, sometimes breaking this rule can lead to breathtaking images. Let’s talk about a few situations where stepping away from the rule can make your photos really pop.
For instance, if you’re capturing a small subject against a massive landscape, try centering it. This approach draws the eye and creates a compelling contrast. Imagine taking a shot of a tiny boat in the middle of an expansive ocean—this placement highlights the boat while giving a sense of scale to the surroundings.
Another great example is when you’re photographing portraits. Centering a subject can help establish a deep emotional connection. When the face fills the frame, it can evoke feelings that are much stronger than if it were just positioned off to the side.
And what about those beautifully symmetrical aerial views, like a perfectly aligned set of fields or a winding road? Centering these elements in your frame really accentuates their balance and beauty. It creates a visual harmony that’s hard to ignore.
Breaking the rule can also inject energy into dynamic scenes. By placing your subjects in less conventional positions, you can capture movement and excitement, like a car speeding through winding roads in an aerial shot.
Lastly, don’t shy away from abstract compositions. Focus on shapes, colors, or unique patterns. These shots can tell a story of their own, free from the constraints of typical composition rules.
To ensure your aerial shots are clear and vibrant even in bright sunlight, consider using daylight viewable monitors to preview your images accurately during outdoor shoots.
Frequently Asked Questions
How to Explain the Rule of Thirds in Photography?
We can explain the Rule of Thirds as a composition technique that enhances visual balance. By framing subjects along gridlines and utilizing negative space, we create aesthetic appeal and image harmony, leading to engaging scenes and creative perspectives.
How Can I Master the Rule of Thirds?
To master the rule of thirds, we should practice composition techniques, utilize framing tips for visual balance, adjust our perspective, and explore subject placement variations. Later, editing strategies can enhance our moment capturing for stunning results.
Is the Rule of Thirds Useful for Beginners?
Absolutely, the Rule of Thirds is invaluable for beginner photographers. It helps us frame subjects creatively, enhances visual balance, and avoids common mistakes, ultimately leading to improved photo aesthetics and landscape harmony through easy adjustments.
How Can I Practice the Rule of Thirds?
To practice the Rule of Thirds, let’s experiment with aerial framing, focusing on subject placement and leading lines. We’ll explore creative angles, using vibrant colors and natural elements to enhance depth perception in our compositions.