As an Amazon Associate, we earn from qualifying purchases. Some links on this site are affiliate links at no extra cost to you. Our recommendations are based on thorough research and editorial judgment.

Color Profiles Explained: D-Log, D-Cinelike, and Standard Modes
When exploring color profiles in video production, we find three main types: D-Log, D-Cinelike, and Standard. D-Log captures a broader dynamic range, needing extensive color grading, while D-Cinelike offers a flatter, less noisy image for quicker edits. Standard presents vibrant colors straight from the camera. Choosing the right profile depends on our filming conditions and goals, so it’s essential to understand their unique advantages and potential drawbacks. There’s more to uncover about optimizing these profiles for your projects.
Key Takeaways
- D-Log provides a wide dynamic range with desaturated images, perfect for detailed color grading during post-production.
- D-Cinelike offers a flatter image with lower noise, making it easier to achieve and correct midrange details quickly.
- Standard mode delivers vibrant colors straight out of the camera, ideal for fast edits without extensive post-production work.
- Dynamic range and noise characteristics vary across profiles; D-Log captures more detail but may introduce noise in bright conditions.
- Equipment like gimbal stabilization and filters enhances footage quality, influencing the choice of the color profile based on filming conditions.
What Are D-Log, D-Cinelike, and Standard Color Profiles?

Hey there! So, let’s chat about color profiles like D-Log, D-Cinelike, and Standard. These profiles can really shape the look of your footage and influence how you edit your videos.
First up, we have D-Log. This one, created by DJI, is designed to capture a wider dynamic range. What that means for you is that your images will be more desaturated, giving you a lot of room to play with colors during color grading later. Just keep in mind, though, it can sometimes bring in a bit more noise, especially in well-lit scenes. A good example is if you’re shooting a sunset; the colors will be muted, allowing you to intensify them in post.
Next, there’s D-Cinelike. This profile gives you a flatter image but helps keep noise levels lower. It’s a sweet spot if you want to ensure your footage looks good without needing to ramp up the bitrate too much. It makes color corrections easier, letting you focus on storytelling rather than getting lost in technicalities. Imagine filming an interview where skin tones are crucial; D-Cinelike helps you adjust the footage to keep everything looking natural.
Lastly, let’s chat about Standard. This mode is perfect if you like vibrant colors right out of the camera without much fuss. It’s practically ready to go, making it a great choice for quick social media posts or personal projects. Think of it as the go-to setting for a sunny day at the park—bright, lively, and fun!
Choosing the right color profile also depends on your drone’s camera resolution quality and stabilization features to ensure the best footage quality for editing.
Why Does Dynamic Range Matter in Video Production?

You know, in video production, understanding dynamic range is super important for filmmakers like us. Dynamic range is basically the range of light that our camera can capture—think about it as the difference between the darkest shadows and the brightest highlights. If we have a camera with a higher dynamic range, it means we can actually capture more details in both those extremes. For instance, when filming a sunset, a good dynamic range allows us to see the rich colors in the sky without losing details in the dark silhouettes of the trees.
Using things like log profiles, such as D-Log, is a great way to extend that dynamic range even further. With these profiles, we get more leeway during color grading in post-production. It’s like giving ourselves a bigger canvas to work with, so we can adjust colors and tones without sacrificing crucial details. On the flip side, if we use standard profiles, we might end up losing some of those important details, which can be a real bummer. Additionally, many modern drones utilize advanced stabilization technology to ensure the captured footage remains smooth and detailed, further enhancing the quality in dynamic scenes.
Comparing Noise Levels: D-Log vs. D-Cinelike

When we compare noise levels in D-Log versus D-Cinelike, it’s clear that noise can really affect the quality of our footage. For instance, shooting in bright sunlight with D-Log often results in noticeable noise, which can be a real disappointment for filmmakers. And if you start cranking the sharpness up in D-Log, you might find those noise levels creeping up even more and muddying your images.
Now, D-Cinelike, on the other hand, does a fantastic job of keeping noise at bay, no matter the lighting situation. Many filmmakers prefer this profile because it not only delivers cleaner footage but also makes post-production smoother. For example, if you’re working on a tight deadline and don’t want to spend hours cleaning up noise, D-Cinelike can save you some serious time and effort.
Ultimately, knowing the strengths and weaknesses of each color profile helps you pick the best one for your project. It’s all about finding what works for your style and needs as a filmmaker. Additionally, understanding how advanced imaging technologies like thermal imaging technology enhance visual data can provide valuable insight into optimizing your footage quality.
Recommended Products

Mavic 4 Pro Dual Focal Length Split Filter Kit: Engineered to overcome the challenges of different focal lengths and apertures, delivering precise exposure control for flawless footage.

【3 Pack Drone Filter Set】 Compatible with DJI Mini 4K, Mini 2 SE, Mini SE, Mini 2, Mavic Mini and Fly More Combos, this circular polarizing neutral density drone filter set elevates your aerial photography and videography to a professional level. Each lens filter quickly snaps onto the camera and locks into place with a hook for secure attachment during flights

【6 Pack Snap On Drone Lens Accessories】 The kit for your drone gear includes 4 x Neutral Density filter (ND4/ND8/ND16/ND32), 1 x circular polarizing filter, and 1 x UV filter, compatible with DJI Mini 4K Drone with 4K UHD Camera for Adults/ Mini 2 / Mavic Mini / Mini SE / Mini 2SE and Fly More Combos, meeting various photography needs, from glare reduction to long exposure effects, as well as providing lens protection. Simple snap on design makes easy and swift filter attachment and dismounting
Maximize Cinematic Quality With D-Log
If you’re looking to maximize cinematic quality, you really can’t overlook the benefits of shooting in D-Log. It’s this cool logarithmic color profile that helps filmmakers like us capture all those stunning visuals with a wider dynamic range, meaning we get to keep more detail in both the bright highlights and the deep shadows. When you’re shooting in D-Log, you’ll notice the footage has a flat look—this is because it’s lower in contrast and saturation. It may need some careful color grading later on, but the results can be truly rewarding.
To get the best out of D-Log, start off with a high-quality camera that shoots in 10-bit color, like the DJI Mavic 3 or the Panasonic GH5. This will give you better bitrates, which is super important for maintaining that high cinematic quality. Also, be mindful of noise, especially if you’re using smaller sensors; nobody wants grainy footage in a dramatic scene!
When you get to the editing stage, using LUTs (Look-Up Tables) is a must. They help transform your D-Log footage into a standard color space like Rec. 709, which is what you typically see in films and TV shows. Remember, applying LUTs can dramatically improve the appeal of your video, making colors pop and bringing your cinematic vision to life.
For the best results, pairing your footage with drones equipped with 3-axis gimbal stabilization can help maintain smooth visuals that complement your color grading process.
D-Cinelike: a User-Friendly Alternative to D-Log With Less Noise
If you’re looking to create stunning footage but feel overwhelmed by complex settings like D-Log, let me introduce you to D-Cinelike. It’s a user-friendly alternative that lets you achieve great results without a steep learning curve. Basically, D-Cinelike gives you a flatter color output—it reduces contrast and saturation, which makes color grading easier.
One of the best parts about D-Cinelike is how it handles noise, especially in bright conditions. For example, if you’re working with a budget camera or are limited by your bitrate, D-Cinelike helps maintain decent quality without overloading your system. You’ll find that it captures really nice midrange details, meaning you won’t have to spend ages tweaking everything in post-production. This can really speed up your editing process.
Sure, it might not excel in retaining shadow detail, but for those of us wanting quality without all the fuss, D-Cinelike strikes a great balance. It’s a solid choice for creating beautiful visuals quickly, leaving you free to focus more on your creative vision rather than getting lost in technical details. Speaking of which, let’s explore how to get the most out of D-Cinelike in your next project!
Additionally, using filters like reverse graduated ND filters can further enhance your footage by balancing light and improving overall image quality.
Recommended Products

【Lightweight Design】 The filter frame is made of aviation aluminum alloy, and the edge of the frame adopts CNC non-slip design, which is easy to install and disassemble. It weighs only 1.2g without affecting drone calibration and balance.

This FPV ND UV Filter Set is compatible with O4 Pro Air Unit, ensuring its adaptability and suitable for aerial video shooting.
Using LUTs to Enhance D-Log Footage Quality
Hey there! So, let’s talk about LUTs, or Look-Up Tables, and how they can really amp up the quality of your D-Log footage. If you’ve ever shot in D-Log, you know it gives you a really flat image, which can be a bit uninspiring at first. But with the right LUT, you can transform that blandness into rich and vibrant visuals.
First off, applying LUTs is like adding a splash of color and life back into your footage. For example, if you’ve filmed a sunset in D-Log, using a LUT can help bring out those warm oranges and deep purples that made the scene pop in real life. It’s all about restoring that contrast and saturation that D-Log seems to lose. And don’t forget—sometimes you’ll need to play around with different LUTs for different scenes, since the lighting can really change the game.
Also, while LUTs do a great job of enhancing your footage, a little manual tweaking can go a long way. Maybe you notice your skin tones look a bit off or your shadows are too dark—sliding those adjustment knobs can help you nail that perfect color balance. Using LUTs effectively speeds up your color grading process, letting you focus on getting your creative vision right while keeping your footage intact. For the best results, consider using advanced color grading tools available in software like Adobe Premiere Pro and Corel VideoStudio Ultimate 2023.
Best Shooting Techniques for D-Log and D-Cinelike
Hey! Let’s chat about shooting techniques for D-Log and D-Cinelike footage. You know, using D-Log can really enhance your video quality, but you have to get the basics right first. When you’re shooting in D-Log, it’s a good idea to set your ISO to 100—that really helps to keep the noise down. And remember to double your frame rate for your shutter speed. For example, if you’re shooting at 24 frames per second, set your shutter speed to 1/50 of a second. This makes sure everything is nicely exposed.
Now, don’t forget about ND filters! They’re super helpful for controlling exposure without bumping up your ISO too high, which can lead to grainy footage. For D-Cinelike, it’s all about getting more dynamic range. Try lowering the contrast settings a bit; it’ll help capture more detail in those bright highlights and deep shadows. And take a look at your histogram while you shoot. You want to keep the important parts of your image above the halfway mark, avoiding any clipping in the highlights or shadows.
With these techniques, you’ll really set yourself up for success in capturing stunning footage. Speaking of capturing details, let’s explore how lighting can further enhance these techniques! Using drones equipped with 3-axis gimbal stabilization can also improve the smoothness and quality of your aerial footage when applying these color profiles.
Recommended Products
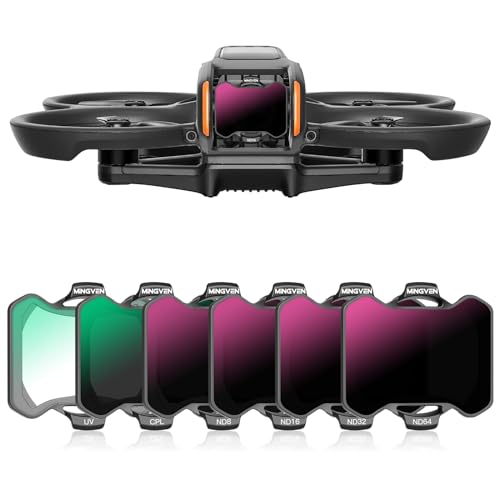
MINGVEN Avata 2 nd filters set includes 6-pack filters (UV, CPL, ND8, ND16, ND32, and ND64). Offer precise exposure adjustments for your drone photography needs. With light reduction ranging from 3 to 6 stops, ensure optimal shutter speeds in varying lighting conditions, ideal for daily photography light reduction needs.

【Lightweight Plastic Frame】 Built with a plastic frame, each filter is easy to install and remove from the camera lens. At just 0.024oz/0.7g, it will not affect drone gimbal calibration and balance

【4-Pack Avata 2 ND Filter】This latest 4-Pack ND Filter Kit From K&F CONCEPT is specially designed for DJI Avata 2, which includes ND8, ND16, ND32, and ND64. Features ultra-lightweight, it ensures your drone gimbal safe, and made of top optical glass to help reproduce uncompromised pictures, it's a valuable addition to your droneshot toolkit.
Selecting the Right Profile for Your Filming Situation?
Choosing the right color profile for filming can really make a difference in the quality of your footage, especially when you’re working with different lighting conditions or planning to edit later on. For example, if you’re shooting in bright sunlight, you might find that using D-Cinelike gives you a cleaner image compared to D-Log. The latter can sometimes introduce unwanted noise, which is something you definitely want to avoid.
On the flip side, if you know you’ll be spending a lot of time in post-production for color grading, D-Log is your best friend. Just make sure your camera settings are optimized—like keeping the ISO low—to minimize any noise. If you’re working with a budget camera or dealing with a limited bitrate, sticking with D-Cinelike can still yield pretty good results without requiring a ton of tweaks later on.
Also, if you’re pressed for time, D-Cinelike’s flatter output is a great option since it usually needs less editing compared to D-Log. That said, D-Log can capture a wider dynamic range, which is perfect for those detailed projects, but keep in mind that lower-end sensors might show limitations. So, think it through and pick a profile that suits your situation best! What’s next on your filming checklist?
Using multi-coated filters can further enhance your footage by reducing reflections and improving image clarity, especially in challenging lighting conditions similar to those where profile choice matters multi-layer coatings.
Recommended Products

Versatile Light Control: Includes ND8, ND16, ND32, ND64, and ND128 filters to reduce light in varying brightness conditions, preventing overexposure and ensuring optimal image quality.

【Dedicated to Mini 4 Pro】 Introducing the latest must have ND & CPL filter set, compatible with DJI Mini 4 Pro. This NEEWER filter kit boasts top notch HD glass that ensure crystal clear imaging during aerial shooting. It's a game changer for drone enthusiasts looking to optimize shutter speeds, minimize glare, enrich colors, and achieve impeccable exposure in varying weather conditions

Frequently Asked Questions
What Is the Difference Between D Log and D-Cinelike?
D-Log captures a wider dynamic range for extensive color grading, while D-Cinelike offers a more straightforward option for quicker workflows. We prefer each for different filmmaking techniques based on our project’s needs and camera capabilities.
What Is the Difference Between Cinelike V and Cinelike D?
Let’s skip the film school drama: Cinelike D’s advantages shine when we dive deep into cinematic color grading, while Cinelike V’s usage is more about instant satisfaction. Choose wisely, or just flip a coin!
What Is D Log Color?
D-Log color is a logarithmic profile that enhances dynamic range, capturing more detail in highlights and shadows. We can use effective color grading in post-production techniques to transform its flat appearance into visually stunning footage.
What Is D-Cinelike DJI?
D-Cinelike from DJI offers advantages like increased dynamic range and easier highlight recovery. When we use D-Cinelike settings, we enjoy simplified post-production workflows, making it a favorite for creative projects and efficient video production.