As an Amazon Associate, we earn from qualifying purchases. Some links on this site are affiliate links at no extra cost to you. Our recommendations are based on thorough research and editorial judgment.

Understanding Graduated ND Filters for Aerial Landscapes
Graduated ND filters help us balance exposure in aerial photography, especially when capturing landscapes. These filters have a gradient tint, which darkens bright skies while keeping the foreground bright. We typically choose between hard edge and soft edge filters based on the horizon line — hard for flat scenes, soft for uneven terrains. During golden hour, they prevent washed-out skies and enhance color contrast. By understanding their types and benefits, we can create stunning images that highlight nature’s beauty. Keep reading to discover more tips and techniques!
Key Takeaways
- Graduated ND filters balance exposure between bright skies and darker landscapes, enhancing detail in aerial photography.
- Soft-edge filters are ideal for uneven terrains, while hard-edge filters suit flat horizons like lakes or oceans.
- Positioning the filter correctly with the horizon is crucial to avoid unnatural light transitions in your images.
- Choosing the right strength of the filter (1 to 4 stops) depends on lighting conditions and desired results.
- Using filters alongside post-processing techniques can create stunning and well-exposed aerial landscape photographs.
What Are Graduated ND Filters and How Do They Work?
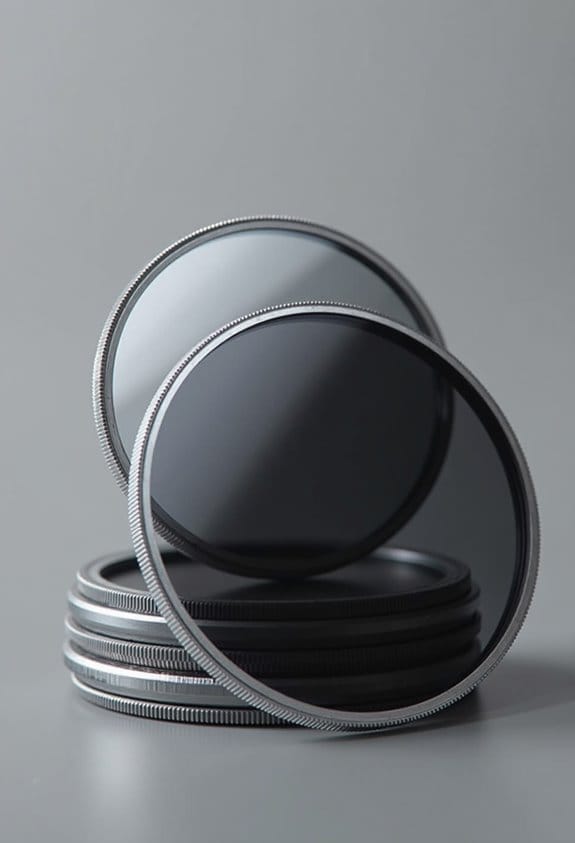
Hey there! Let’s chat about graduated ND filters – they’re an incredible tool that can really take your landscape photography to the next level. Basically, these filters have a gradient tint that goes from dark at the top to clear at the bottom. This helps you cut down on the bright light from the sky while still capturing details in the darker parts of your scene, like trees or rocks in the foreground.
They usually come in different strengths, known as “stops,” typically ranging from 1 to 4. If you’re shooting a landscape with a lumpy, uneven horizon, a soft-edge filter works wonders. On the other hand, if your scene has a nice, flat horizon – think of a beach at sunset – a hard-edge filter is your best bet.
When you use these filters, it’s all about positioning. You’ll want to line up the gradient with the horizon line to avoid those pesky light bands that can mess with your image. This technique can really minimize the time you need to spend editing later, letting you focus more on capturing those stunning landscapes. So, are you ready to give graduated ND filters a try on your next shoot?
For the best results, consider using filters made from Schott B270 glass to ensure superior optical clarity and durability.
Why Aerial Landscape Photographers Need Graduated ND Filters
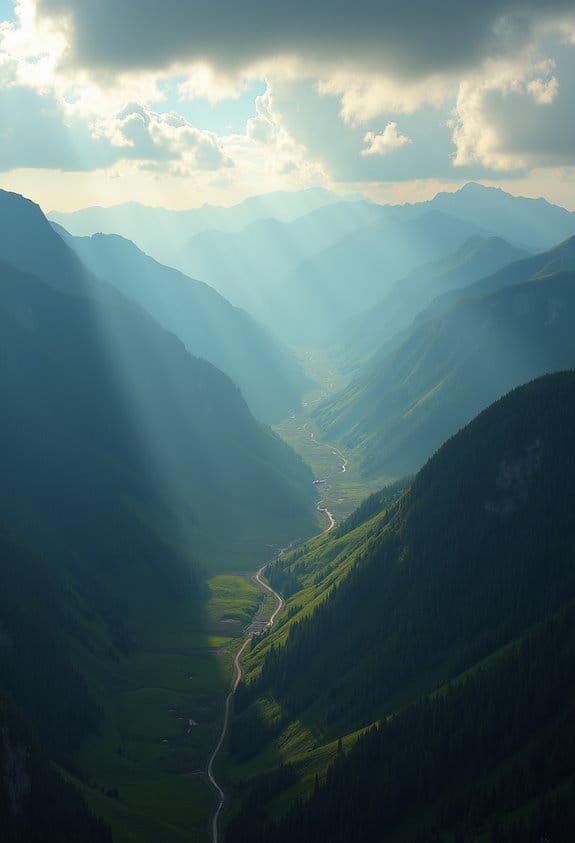
If you’ve ever tried your hand at aerial landscape photography, you know how tricky it can be to get the exposure just right. That’s where graduated ND filters come in—these handy tools help balance out the bright sky and darker land below. Imagine shooting at golden hour when the sun is setting, casting a brilliant glow above while leaving the ground in shadow. Without a graduated ND filter, you might end up with a washed-out sky or an overly dark ground.
These filters work their magic by gradually darkening the sky so that you can snap a single shot with everything looking just right. They typically come in different strengths, like 1 to 4 stops of light reduction. I usually reach for a soft-edge variant, especially when capturing uneven landscapes. It creates a smooth transition, like when you’re shooting over hills or valleys. Plus, using these filters can save you a lot of time in post-processing—meaning you can spend more time enjoying your photos and less time editing! Using filters made from high-quality optical glass ensures clarity and accurate color rendition in your shots.
Types of Graduated ND Filters: Hard Edge vs. Soft Edge

Hey! Let’s chat about graduated ND filters, specifically the difference between hard edge and soft edge filters. Understanding these two types is super important for photographers like us, especially when we’re trying to capture that perfect shot.
So, here’s the scoop: hard edge filters are fantastic when you’re dealing with a landscape that has a clear horizon line—think seascapes where the ocean meets the sky. They create a sharp transition between the bright sky and darker elements in the foreground. On the flip side, soft edge filters provide a gradual transition and are ideal for more uneven landscapes, like forests or mountainous areas. They help blend the exposure between the sky and the ground more seamlessly.
For instance, during golden hour, using a 2 stop soft edge filter can be a game changer. It helps balance the brightness difference between a brightly lit sky and a darker foreground, making your photos look more natural. And if you’re into photographing sunrises or sunsets, consider a reverse graduated ND filter. This filter darkens the horizon while preserving the details in the sky—perfect for those stunning aerial shots.
Once you get the hang of these filters, you’ll notice how they can elevate your landscape photography. Remember, pairing your filters with high-performance equipment like V90 memory cards ensures your camera can handle the dynamic range and data speed required for capturing these scenes flawlessly. Ready to dive into some techniques for utilizing them effectively? Let’s explore that next!
How to Choose the Perfect GND Filter for Aerial Photography
When it comes to selecting the perfect graduated ND (GND) filter for your aerial photography, it helps to understand a few key aspects that can really enhance your shots. First off, you’ll want to choose the biggest filter size that fits your drone’s camera. This way, you get complete coverage without any pesky vignetting at the corners of your images. For instance, if you’re shooting during golden hour, a 2-stop soft GND filter works wonders because the sky often appears about two stops brighter than the landscape below.
Now, let’s talk about lighting conditions. If you’re flying in a particularly bright environment, don’t hesitate to go for a stronger filter—up to 3 stops can make a difference. It’s also a good idea to play around with the placement of your filters. Take your drone out for test flights and adjust the filters to see how they affect the exposure balance between the sky and the ground. That hands-on experience will really help you capture the stunning aerial landscapes that you’re aiming for.
Next up, let’s explore how to decide on filter placement and adjust your settings for those perfect shots! Additionally, pairing your aerial photography gear with high-speed memory cards ensures quick file transfers and smooth workflow on location.
Where’s the Best Place to Position Your GND Filter?
When you’re out there capturing those breathtaking landscapes from above, you might wonder where the best place is to position your Graduated Neutral Density (GND) filter. It’s super important to get it right for a balanced exposure in your shots. The trick is to line up the darker part of the filter with the horizon line. This way, it helps tone down that bright sky while keeping your foreground nice and well-lit.
Now, if you’re dealing with uneven landscapes, a soft-edge GND filter is your best friend. It gently transitions across the frame, which works wonders for areas with hills or valleys. On the flip side, if your scene has a solid, straight horizon—like over a body of water—a hard-edge GND filter gives you the precision you need to manage the light perfectly.
Just remember to keep an eye on the key elements in your foreground. You want them to pop without overexposing the sky above. For example, a majestic tree standing in the foreground looks incredible with the right exposure, while the sky behind it remains dramatic and colorful. Balancing these elements will definitely make your images sing! Now, let’s explore how to use your GND filter with different lighting conditions. Using drones with adjustable lenses can further enhance your ability to capture these complex lighting scenarios.
Best GND Filter Tips for Photographers at Golden Hour
Hey there! If you’re looking to capture those breathtaking aerial landscapes during golden hour, using Graduated Neutral Density (GND) filters can really elevate your shots. I recommend starting with a 2-stop soft graduated ND filter. It’s perfect for evening out the exposure between that bright sky and the darker foreground, keeping your images balanced and pleasing to the eye.
When you set up your filter, pay attention to where you position it in relation to your main foreground elements. For instance, if you’re photographing a mountain range with a vibrant sunset, make sure the filter aligns with the horizon so you get the best results. And don’t forget to keep your filters clean; a little dust can create some annoying light bands in your photos!
Another tip is to pair your GND filter with a polarizer. This combo can really enhance the colors and cut down on glare, particularly when you’re shooting reflective surfaces like water or wet rocks. To get the right strength of your filter, try averaging the light readings from your foreground and sky—this way, you’ll nail that perfect exposure.
With these tips in your toolkit, you’ll be well on your way to capturing those stunning landscapes. Additionally, using filters made with multi-layer coatings can reduce flare and improve image quality during your shoots. Let’s move on to talk about the best camera settings to use during golden hour for even more impactful photography!
Maximizing Impact in Aerial Photography Using GND Filters in Post-Processing
Aerial photography is such a fantastic way to capture the beauty of landscapes from a unique perspective, and using GND filters during post-processing can really elevate your images. Think about it: when you’ve got that stunning contrast between the bright sky and the detailed foreground, it just brings your photos to life!
To make your images pop, try this: brighten the foreground a bit. It will draw the viewer’s eye right where you want it. Or if you’re feeling bold, darken the sky to add some drama. Tools in photo editing software, like masks or layer blending, make it pretty easy to create those seamless transitions between the sky and landscape.
For instance, you might want to enhance a sunrise shot where the sky is ablaze with color, but the ground is a bit too shadowy. A gentle adjustment can highlight that gorgeous sunrise while keeping the details in the ground visible. When you combine GND filters and these post-processing techniques, your aerial photographs can truly showcase nature’s vibrant beauty like never before. Next up, let’s chat about some editing tools that can help you achieve these effects!
Also, incorporating footage from drones with 4K Ultra HD cameras can provide highly detailed source material that benefits greatly from GND filter adjustments in post-production.
Frequently Asked Questions
Can Graduated ND Filters Be Used With Drone Photography?
Yes, we can definitely use graduated ND filters with drone photography. It enhances our exposure control strategies, optimizes landscape composition, and allows for creative drone captures while adjusting light conditions effectively using compatible filters and mounting options.
How Do I Clean My Graduated ND Filter Properly?
To clean our graduated ND filter, we should use a microfiber cloth and gentle cleaning solutions, avoid scratches, and store it properly. Regular maintenance extends filter lifespan, while proper drying techniques guarantee peak performance.
What Are the Best Brands of Graduated ND Filters?
Did you know 70% of professional photographers prefer premium brands? For graduated ND filters, we recommend B+W Filters, Hoya Filters, Tiffen Filters, Lee Filters, Formatt Hitech, Nisi, Singh Ray, Cokin, Breakthrough, and K&F Concept.
Do Graduated ND Filters Affect Color Accuracy in Images?
Yes, graduated ND filters can affect color accuracy slightly. They impact color balance, exposure compensation, and saturation levels, influencing scene dynamics. With proper filter coating and light transmission, we can mitigate post-processing effects and lens distortion.
Can I Stack Multiple Graduated ND Filters Together?
Like a painter blending hues, we can stack graduated ND filters for precise exposure control, but let’s verify filter compatibility for best optical quality. This technique enhances light transmission and color gradation in landscape photography.


