As an Amazon Associate, we earn from qualifying purchases. Some links on this site are affiliate links at no extra cost to you. Our recommendations are based on thorough research and editorial judgment.

Mastering Top-Down (Nadir) Photography Perspectives
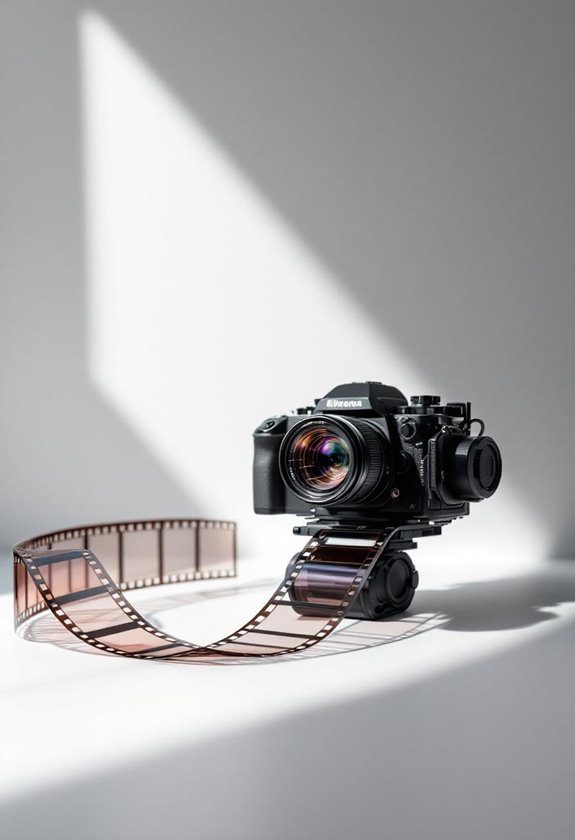
To master top-down, or nadir photography perspectives, we need to capture images directly downward, ensuring minimal distortion and accurate ground representations. Using survey-grade drones improves stability and clarity, while flight planning apps help automate image capture. Key tips include maintaining a level camera position, achieving at least 70% overlap between images, and calibrating equipment to reduce distortion. Understanding these aspects is essential in various fields, from urban planning to disaster response, so let’s explore further how we can enhance our skills.
Key Takeaways
- Ensure your camera is positioned at a 90-degree angle directly downward to capture true nadir images, minimizing distortion.
- Utilize survey-grade drones with advanced stabilization systems to enhance image clarity and maintain flight stability.
- Plan automated flight paths with at least 70% image overlap for accurate stitching and comprehensive coverage in mapping tasks.
- Calibrate your equipment before flights and adjust settings according to lighting to prevent overexposure or distortion in images.
- Practice capturing nadir shots on calmer days to avoid wind disturbances, ensuring a level camera for optimal clarity.
Understanding the Nadir Perspective in Aerial Photography
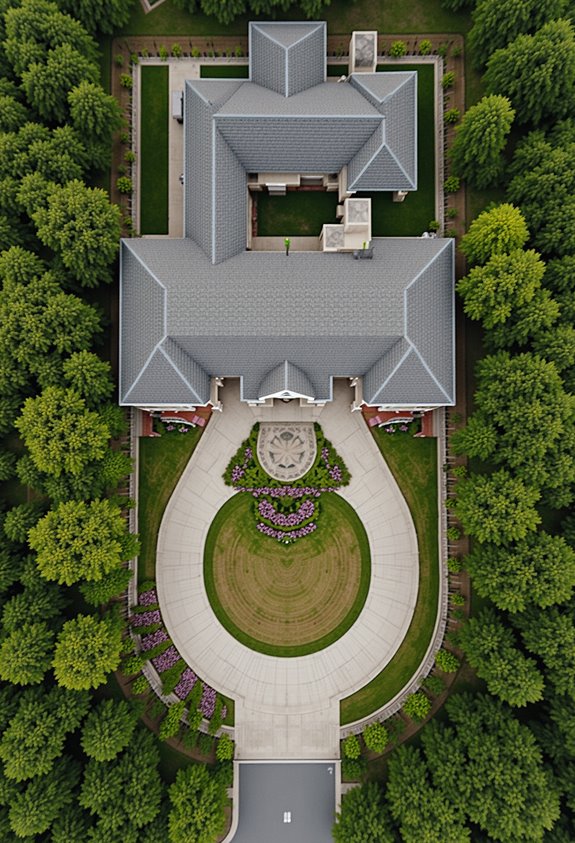
So, have you ever heard of nadir perspective in aerial photography? It’s this really cool technique where the camera snaps images straight down at a 90-degree angle. This angle is super useful because it minimizes distortion, helping us get accurate representations of the ground below. You can imagine it as looking straight down from a tall building — everything seems more precise, right?
Nadir images are crucial for a bunch of different applications. For example, if someone is mapping out a city or analyzing land use patterns, they rely on these clear, straightforward images. They’re also vital in disaster response since knowing exactly what the ground looks like can guide rescue efforts and recovery plans.
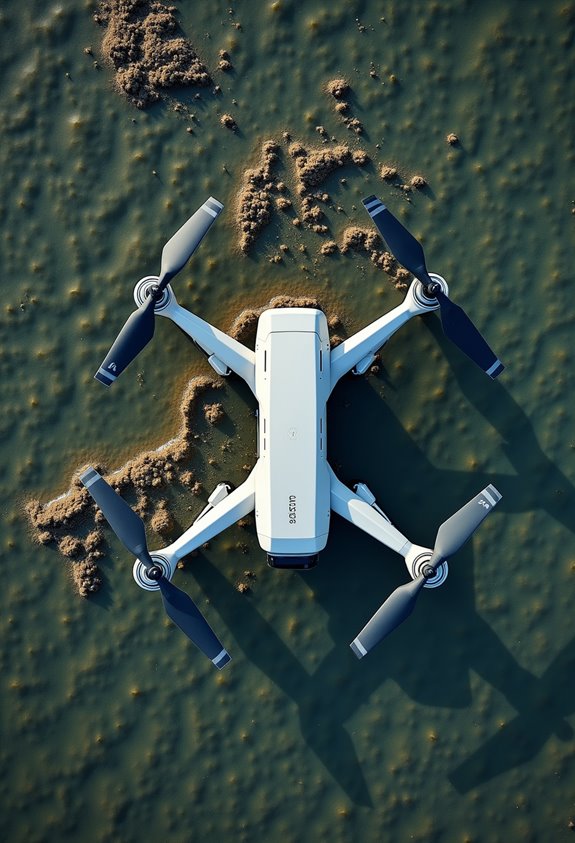
When you use survey-grade drones, the accuracy of those nadir images really shines. Since the camera is perfectly aligned, any little inaccuracies are taken care of, making them ideal for urban planning and environmental studies. You know that small point directly under the camera’s lens? That’s the nadir point! And, if you’re checking the metadata of these photos, you’ll often see that the camera angle is marked as 0 degrees, making it easy to spot them compared to tilted oblique images. Isn’t that fascinating?
Speaking of drones and photography, let’s explore how these tools are changing our approach to environmental studies and conservation efforts. Advanced drones also come equipped with GPS functionality and safety features, ensuring precise positioning and reliable data collection during aerial surveys.
Discover the Benefits of Nadir Photography for Drones
Have you ever thought about how nadir photography could change the way we gather aerial data? This technique, where the camera faces straight down, has some fantastic advantages that make our work much easier. For instance, when you capture images from this angle, you reduce distortion, which is super helpful for tasks like mapping and surveying.
One of the coolest things about nadir shots is that they improve stitching accuracy in mapping software. That means when you put multiple images together, they line up perfectly, making your data analysis clearer and more reliable. Plus, when you’re creating orthophotos—basically super-accurate aerial maps—those straight-down images allow for precise distance measurements, which can be vital for planning projects.
Using automated flight planning with your drone can also streamline your aerial photography sessions. For example, you could set a specific route for your drone to follow that maximizes coverage while minimizing flight time. This way, you can capture a lot of quality images without wasting battery life or resources.
Additionally, leveraging drones with advanced stabilization systems, like 3-axis brushless gimbals, ensures sharper images and increased flight stability during nadir photography.
Recommended Products

【A Fun Tech Gift for Him】 The perfect high-value tech gift for Father’s Day, birthdays or holidays. Whether for parent-child activities or capturing travel memories, this drone brings families together through the joy of flight.

[FAA Compliant, Lightweight But Mighty] Featured with Holy Stone latest design, Holy Stone HS900 GPS 4K Drone weighs only 249 grams (8.7 ounces); Holy Stone HS900 Drone with Camera doesn’t need FAA registration or a Remote ID in the States. Enjoy pure thrill and total freedom.

【𝐒𝐭𝐮𝐧𝐧𝐢𝐧𝐠 𝟖𝐊 𝐈𝐦𝐚𝐠𝐞𝐬 & 𝟒𝐊 𝐕𝐢𝐝𝐞𝐨】: With the advanced camera and 1/2 CMOS(Million Pixels), you can record breathtaking 8K images and 4K/30fps video directly onto your SD card, offering you an incredible shooting experience. The digital 5x zoom capability also provides greater detail of your view.
Learn Essential Techniques for Capturing Nadir Shots

If you’re looking to capture some impressive nadir shots, you’ve come to the right place! Nadir shots are those stunning images taken straight down from above, and they can really showcase the beauty and detail of the landscape below. The key here is to ensure your camera is hanging directly downward at a 90-degree angle; this way, you’re getting the best view of what’s beneath you.
First off, stabilization is crucial. I recommend using a survey-grade drone, as it gives you exceptional stability, allowing you to align the nadir shot perfectly with the center pixel of your camera. This means your images will have that clarity we all aim for. Another tip is to calibrate your equipment properly—you don’t want any distortion ruining your shots. For instance, once you’ve adjusted the settings on your drone, consider doing a test flight over an open area to confirm everything looks good.
When it comes to lighting, pay attention to your shutter speed. If it’s a bright sunny day, keep your shutter speed fast to avoid overexposing the photo, while on a cloudy day, you can slow it down a bit to capture those details. Using flight planning apps can also be a great help—they can automate your image capture and ensure that your shots overlap perfectly. This overlap is super helpful when you move into post-processing for stitching those images together.
Choosing a drone with a durable 3K carbon fiber frame can significantly enhance flight stability and durability during extended aerial shoots.
With these simple yet effective techniques, you’ll be well on your way to creating exceptional nadir imagery! Ready to learn about other types of aerial shots? Let’s explore that next!
Recommended Products
No Registration Needed - Under 249 g, this drone with camera for adults 4K does not require FAA registration or Remote ID for recreational use. Visit the FAA's official website for requirements related to drone registration and Remote ID. [1]

【Ultra-Long Control Range】With an astonishing control distance of 2,650 feet, it far surpasses other drones that only offer a control distance of 250 feet. This extended range enables your drone to soar freely and unrestrainedly in the sky.
Practical Tips for Accurate Nadir Photography With Drones
So, you want to get into nadir photography with drones? That’s awesome! Nadir photography is all about capturing those straight-down shots that really showcase landscapes or structures below. To do this accurately and get great images, there are a few key things you’ll want to consider.
First off, make sure your drone is equipped with a high-quality, survey-grade camera. This will help reduce any distortion in your images and improve the accuracy of the positions you’re capturing. Imagine trying to take a picture of a building, but the image comes out warped—you definitely want to avoid that!
Next, I highly recommend using flight planning apps. These can automate your image capture process and help ensure that you maintain at least a 70% overlap between your images. With this approach, you’re setting yourself up for smoother editing later on. Plus, keeping the camera at consistent angles will save you a ton of time during post-processing.
Also, don’t forget to calibrate your drone’s GPS and camera settings before you fly. Just think of it like warming up before a workout. It helps you avoid any inaccuracies that could mess with your shots. And speaking of accuracy, keep ground sampling distance (GSD) in mind; flying at lower altitudes usually gives you that higher resolution you’re after—like when you zoom in on a map and see all the details.
Lastly, always be aware of local drone regulations. Checking for any required permits or restrictions can help you stay compliant while getting those stunning aerial images. By understanding these basics, you’re already on the right path to mastering nadir photography with your drone, and soon enough, you’ll be the one sharing your tips!
Additionally, choosing drones with 1 inch sensors can significantly enhance image quality, especially in low-light conditions, making your nadir shots more vivid and detailed.
Recommended Products

【2K Ultra HD Camera】Loiley drone features a high-quality 2K HD camera with a 90° remote adjustable angle, allowing you to capture breathtaking photos and ultra-clear videos from the sky. Whether it's a scenic landscape or a special family moment, this drone helps you preserve every beautiful memory with precision. Simply connect your smartphone to the drone’s camera to enjoy a real-time panoramic view, and easily share your adventures directly to social media with just a tap

No Registration Needed - Under 249 g, this drone with camera for adults 4K does not require FAA registration or Remote ID for recreational use. Visit the FAA's official website for requirements related to drone registration and Remote ID. [1]
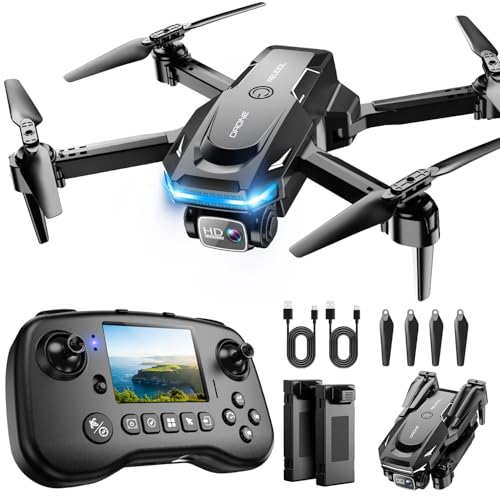
The PK01 drone's remote comes with a super handy built-in screen—no phone needed—so you can watch live HD footage and check flight stats right in your hands. (An SD card is required to save images and videos; not included) Powered by tough brushless motors, this little flyer is strong, smooth, and built to last. With one-key takeoff/landing, headless mode, and even 360° flips, you’ll look like a pro in no time. Ready for takeoff?🤩
Common Challenges and Solutions in Nadir Photography
When you’re exploring nadir photography, you’ll encounter a few common challenges that can really affect your images. For instance, getting your camera perfectly level is super important; even a tiny tilt can mess with the image clarity. Think of it like balancing a book on your head—if it leans even a little, it just won’t look right!
You also have to consider things like wind and other environmental factors that can shake your setup. This is where drone stabilization systems come in handy. Waiting for a calm day can also make a big difference—not only do you get steadier shots, but you can really capture the beauty of your surroundings without those pesky vibrations.
When putting together a seamless composite image, overlapping your shots is key. It’s like piecing together a puzzle; you want to make sure the edges line up perfectly. Planning your flight path with that overlap can save you tons of headaches later on with stitching your images together. Plus, GPS accuracy matters too—you’ll want to use high-precision systems to keep your nadir point aligned.
Finally, lighting plays a huge role in how your photos turn out. Soft, golden hour light can add so much detail and depth to your shots; it’s definitely worth the wait for that perfect moment. So, as we’re thinking about these elements, let’s also consider how we can enhance our images further with good composition techniques!
Additionally, utilizing drones equipped with 360-degree obstacle avoidance can greatly increase flight safety and stability, ensuring uninterrupted focus on perfecting nadir shots.
Recommended Products

795g (1.75lbs) Lightweight and Portable - DJI RS 3 Mini is an ultra-compact gimbal stabilizer for camera convenient for travel. Weighing only 795g (1.75 lbs), RS Mini 3 is easy to hold for extended shooting.

Wide Compatibility: Compatible with digital FPV Camera systems such as DJI O4 Air Unit PRO, O3, Walksnail Avatar, Walksnail Moonlight, RunCam link wasp and 19mm wide analog cameras.

𝐂𝐨𝐦𝐩𝐚𝐭𝐢𝐛𝐥𝐞 𝐰𝐢𝐭𝐡 𝐆𝐨𝐏𝐫𝐨𝟑 𝐑𝐂 𝐐𝐮𝐚𝐝𝐜𝐨𝐩𝐭𝐞𝐫 – designed for smooth gimbal stabilization.
Applications of Nadir Imagery Across Various Industries
Hey there! Have you ever thought about how nadir imagery is used in different fields? This top-down view photography is incredibly useful, and it’s fascinating how it impacts a range of industries. For instance, in urban planning, nadir images provide valuable data that helps city officials understand land use and calculate distances accurately. It’s like having a bird’s eye view that makes planning easier and more effective.
In agriculture, farmers rely on nadir imagery to keep tabs on their crops. By looking at plants from above, they can spot any health issues or monitor yield potential. Imagine a farmer scanning their fields from the sky—it’s a game-changer for assessing plant conditions.
Then there’s disaster response. When something goes wrong, nadir photography steps in as a crucial tool. Teams use it to survey damage after a natural disaster systematically, which helps them figure out how to best help affected areas. It’s a simple yet powerful way to strategize recovery efforts.
Environmental studies benefit as well! Nadir imagery helps researchers gather baseline data to track ecological changes and assess land cover over time. It’s all about seeing the bigger picture. With so many practical uses, you can really see why nadir imagery is so significant today. What other applications do you think it has? Additionally, thermal imaging drones with high-resolution thermal sensors enable capturing detailed top-down temperature data, enhancing analysis across these various fields.
Recommended Products

🏆【AUTEL ROBOTICS USA AUTHORIZED】We are the longest and largest distributors of Autel Robotics. Over the years, we have maintained a close partnership with Autel, providing customers with high-quality products and excellent after-sales service. With extensive experience and strong technical expertise in this industry, we are able to offer customized solutions and professional technical support to our customers. All the UAVs we offer include FULL USA WA-RRANTY. 📣For ass.istance with packaging, accessories, usage, firmware updates, warranty repair or met any issue, please rea.ch our su.pport team at 💌autelofficial @ outlook . com💌

👍【2026 NEW: AUTEL EVO LITE 640T ENTERPRISE】Weighing just 866g and featuring a compact foldable design (210×123×95mm), the Autel Robotics EVO Lite 640T Enterprise is easy to carry in any backpack. Its user-friendly operation allows for efficient mission execution by a single p~i~lot. 🩷Friendly NOTE: Autel Lite 640T Enterprise supports Remote ID. 📩 Need help? R.each out to us at: 📩📩AutelStoreOnline @ outlook . com📩📩
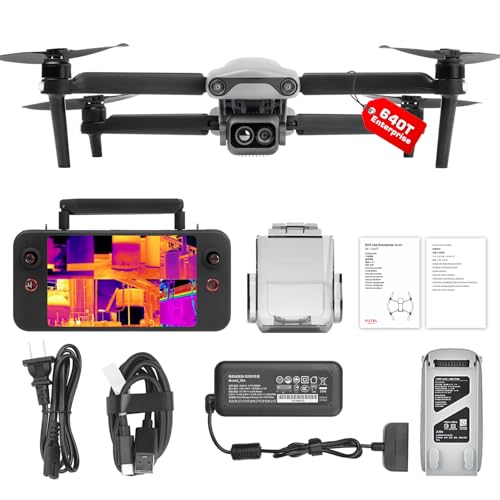
👍【2026 NEW ARRIVAL, AUTEL EVO LITE 640T ENTERPRISE】Ready to elevate your mission capabilities? Weighing just 866g and featuring a compact foldable design (210×123×95mm), the Autel Robotics EVO Lite 640T Enterprise is easy to carry in any backpack.With a simple operation, it is ideal for efficient execution of missions by a single operator. 🩷Friendly NOTE: Autel Lite 640T Enterprise supports Remote ID. 📩 Need help? R.each out to us at: 📩📩AutelStoreOnline @ outlook . com📩📩
Frequently Asked Questions
How Is Nadir Used in Photography?
Nadir photography’s about capturing straight-down images, letting us explore unique creative compositions. By carefully considering nadir angles, equipment choices, and lighting techniques, we can produce stunning visuals that accurately represent our subjects.
How to Take Good Top-Down Photos?
To take good top-down photos, we should focus on composition techniques, use precise camera angles, consider lighting tips, and carefully select subjects that create visual interest. It all sets the stage for stunning images!
What Is Nadir in Photography?
Nadir in photography refers to the precise camera positioning at 90-degree angles, focusing on subject alignment. We often encounter common misconceptions about nadir angles, but understanding this concept elevates our aerial imagery quality considerably.
What Is the Difference Between Nadir and Oblique?
It is understood the difference between nadir and oblique; nadir angles provide uniform aerial shots, while oblique perspectives showcase depth. By mastering these photography techniques, we can capture stunning images with unique visual appeal.